Install and use QGreenland Custom
QGreenland Custom is a QGIS plugin for downloading a custom set of data, including data which is not part of the QGreenland Core zip package. This how-to guide walks through how to install the plugin and how to use its basic functions.
Installing QGreenland Custom
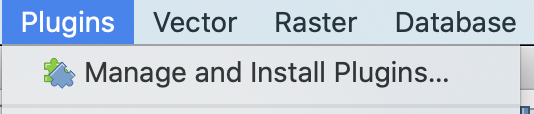
To get started with this guide, access the Plugin tab in the top Menu Bar*, and select Manage and Install Plugins.
This will open the Plugin pop-up window. First, click the Settings tab and select the check box labeled Show also experimental plugins so that QGreenland Custom will be included.

Navigate to the All tab in the plugin window, and search for QGreenland Custom. Click Install plugin and close.
Configuring QGreenland Custom
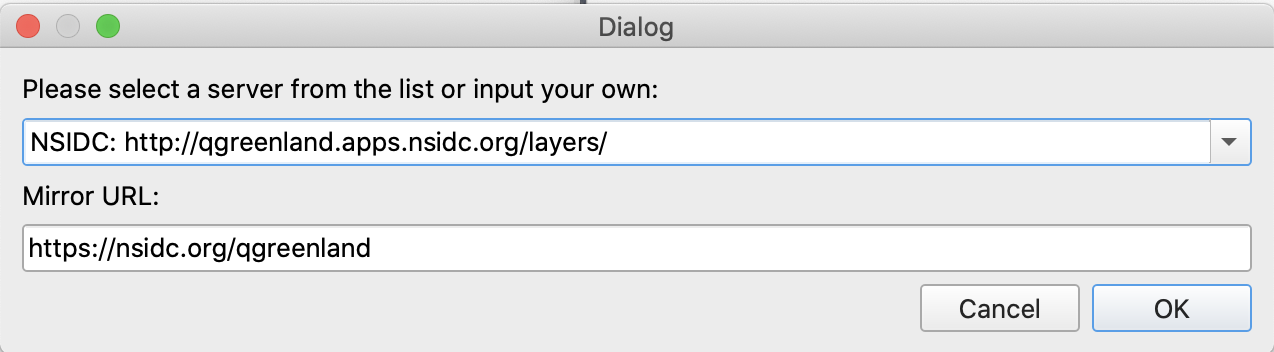
To use QGreenland Custom, first navigate to Web -> QGreenland -> Configure the Server. Leave the default options and press OK.
Searching for data layers
Now that you have the plugin installed and configured, you can begin downloading and using data in QGreenland Custom. To access the plugin, find the QGreenland logo in the Menu Bar. Clicking on this icon will open the plugin. Initially, you should see a list of layer directories.
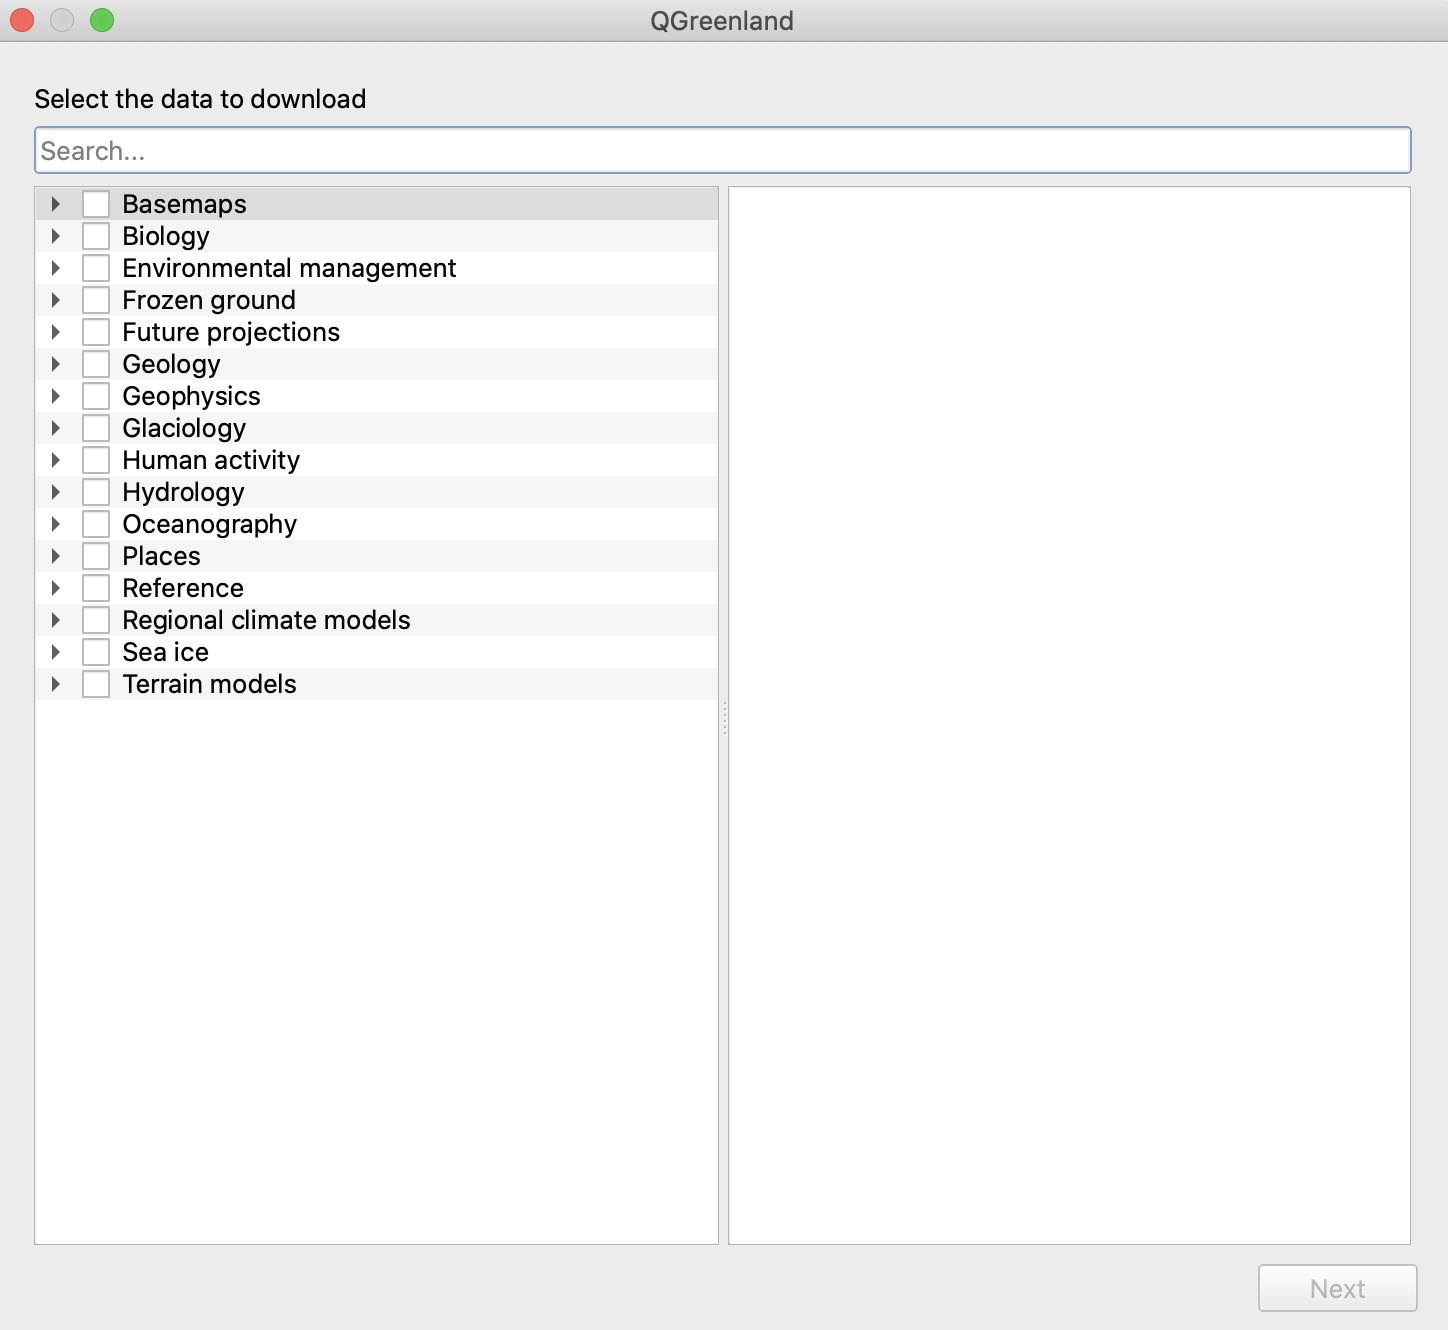
Using the top search bar, type in a layer or keyword, such as ‘towns’ or ‘earthquakes’. Once you have located a layer of interest, click the checkbox and click Next at the bottom of the window.

Downloading the data
Next, you will need to choose a storage location to download the data. Select your location using the three dot icon, and once you have chosen a location, click the Download button. When the download is finished, you will see a blue bar at the bottom of the window showing your downloaded layer. Click Next.

Note
Note that the beta version of the QGreenland Custom plugin currently functions separately from the QGreenland Core package in regards to storing and adding data, which means that the QGreenland Custom plugin does not access and read the QGreenland Core downloaded data. To add a data layer to a new project, that layer needs to be downloaded within QGreenland Custom to be accessible within it.
Next, you will be asked to select which downloaded layers you would like to add to your QGIS project. This will be a full list of downloaded layers, so there may be more than one layer listed if you have used the plugin more than once or selected to download multiple layers at once.

Find your layer of interest and click the checkbox, then click Add to project. Once the layer has been added, you should see the new layer in the QGIS Layer Panel and in the Map View. Click Close to exit the plugin.